
Don’t bin your food – Turn it into compost!
If you live in a small space but still want to grow your own vegetables while avoiding food scraps going in your rubbish bin, then Bokashki composting may be for you. I can compost all my food scraps, tea bags, and baking paper in my small London flat and end up with nutrient-rich soil that I can use to grow my own vegetables in just about four weeks.
Bokashi composting originated in Japan but is now gaining popularity worldwide as a sustainable method of recycling organic compost. It uses a fermentation process to break down organic compost into nutrient-rich compost, which you can then use to grow your own fruits and vegetables.
It has the benefit of being faster than conventional composting techniques, but many factors will affect how long you can ferment in a bokashi bin. These include the size of your bin, what you put inside of it (larger foods take longer to ferment), and the temperature and humidity of the location where you keep your bin.
What you can put in your bokashi bin
The term “bokashi” actually means “fermented organic matter” in Japanese, and with the help of beneficial microorganisms found in bokashi bran, it can break down:
- Vegetable and fruit scraps
- Tea leaves and coffee grounds
- Grains and bread
- Garden compost like dead leaves
- Shredded paper and cardboard
If you practise zero waste and want to put in anything claiming to be compostable, such as tea bags or parchment paper, just be aware that it can take longer than four weeks for these materials to decompose fully. I avoid using the trash can by putting everything I can into my bokashi, so I don’t mind if there are still some larger food pieces that haven’t been broken down. When I go to plant, I’ll filter the soil, and I’ll keep these bigger pieces—often avocado skins—in the storage box for a while. In the end, it’s a win-win situation since you’ll be rewarded with high-quality soil to grow your food and you’ll drastically reduce the quantity of waste you’re throwing away.
You can still do bokashi composting if you don’t want to grow your own plants, and then donate your soil to a neighbour or even to an allotment. But given how satisfying it is to grow your own food, why not try it?
What you’ll need
- Bokashi Bin (x2)
- Bokashi Bran
- Storage Box
- Potting Soil
Optional:
- Kitchen Gloves
- Garden Gloves
- Trowel
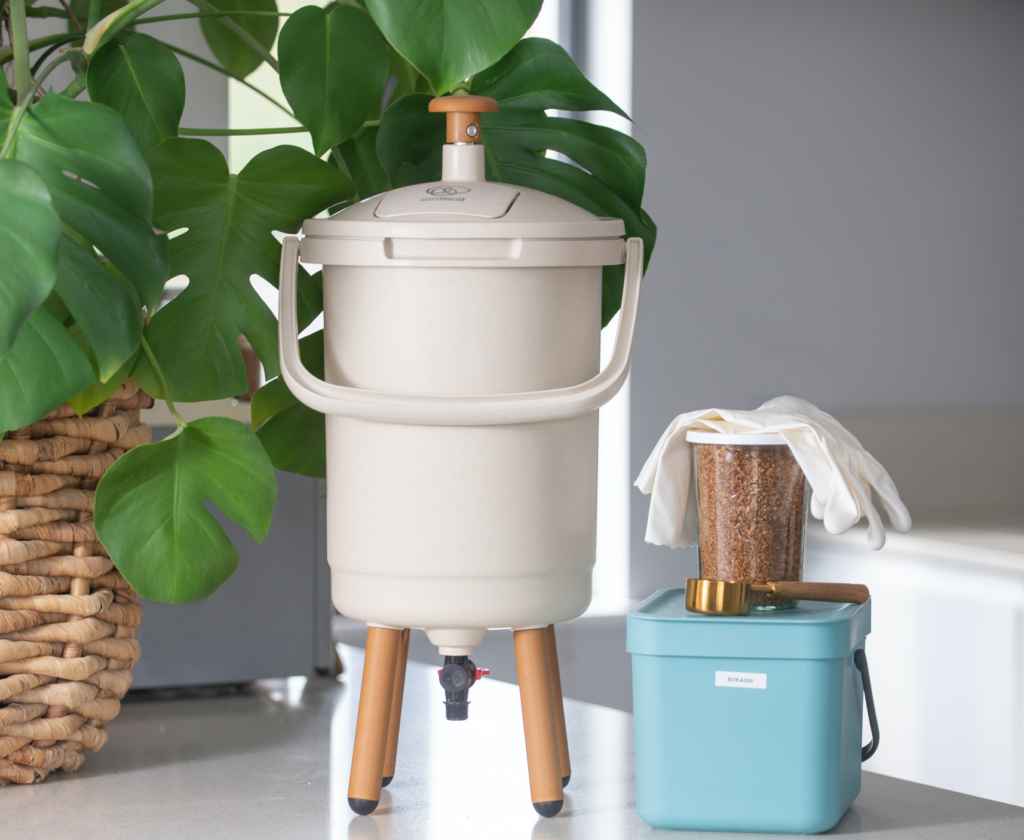
Bokashi Bin
You’ll want a container or bin with an airtight lid to begin a bokashi composting system. To prevent the scraps from resting in liquid after they begin to decompose, the bins typically come with a mesh plate that lies at the bottom. Additionally, it includes a tap for draining the bin and a tool for mashing compost. Although my new bin already has the masher built in, in my experience the mashing tool is always cheap and breaks easily, so I save some cardboard and place that on top to force it down. And finally, there’s the lid. This needs to be airtight in order for the fermentation process to be successful.
You can make these yourself, or if you’re in the UK, check out your local council, as some of them offer discounts on bokashi bins. If you have a large household, you may need to buy a bigger bin or have a few bins on hand to keep in rotation. It’s just me and my husband (plus our two cats), and two bins have worked well for us.
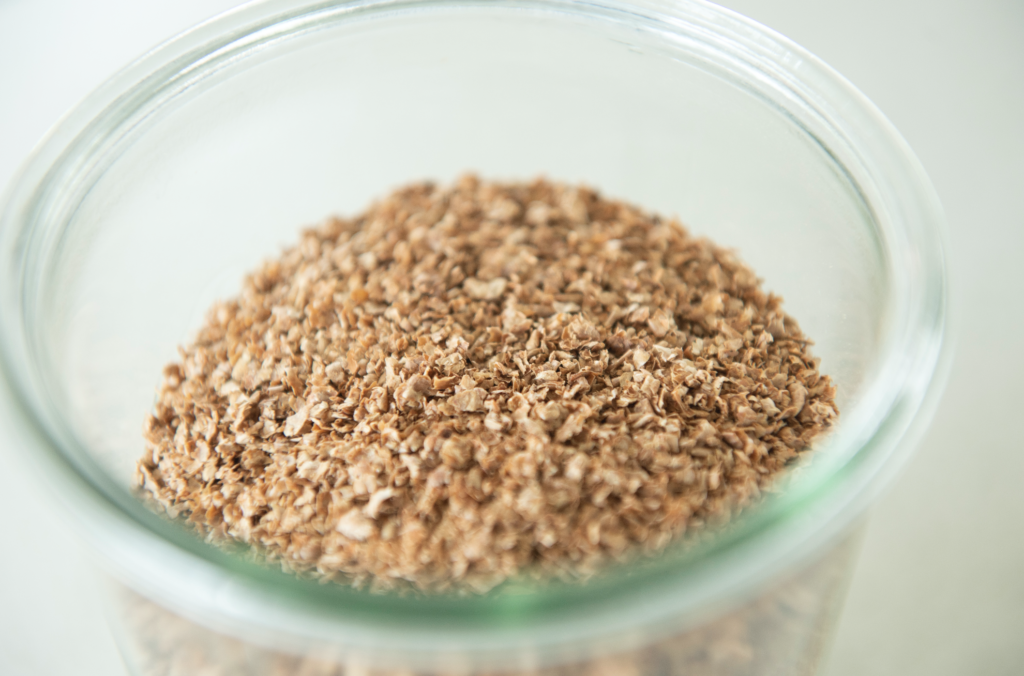
Bokashi Bran
Next, you’ll need bokashi bran. This is made from wheat or rice bran with added ingredients made up of lactic acid bacteria, yeasts, and other types of bacteria, which work together to break down the organic compost through fermentation.
The specific blend of microorganisms can vary depending on the manufacturer and the formulation, but commonly it includes species of Lactobacillus and Saccharomyces, along with other beneficial bacteria and fungi. In addition to microorganisms, some bokashi bran formulations may also include other additives such as molasses or other sources of carbohydrates, which provide food for the microorganisms and help to support their growth.
You can make bokashi bran yourself, but I have only used it premade.
Storage Box
Once the compost has finished fermenting in the bokashi bin, you’ll need a place to put it for the second step of the bokashi process. If you have a garden, you can dig a trench in the dirt; otherwise, I use a sizable plastic storage container with drainage holes drilled into the bottom. I placed the contents of the bokashi bin in it after partly filling it with potting soil and covered it with the remaining soil to allow it to fully decompose.
The size of your bin will completely depend on where you’re going to store it. I have a small roof terrace where I keep mine, but I’d go for a smaller container if it were going on my balcony. You can also keep it in your flat if you have no outside space but don’t drill holes in the container.
You want to mimic burying the food waste underground, so avoid using clear storage containers.
Potting Soil
The fermented compost can be added to any type of soil, but for best results, mix it with high-quality potting soil. Garden soil should be avoided if you keep the box on a balcony or inside because it may have other critters inside.
Optional Supplies
I’d also highly recommend some kitchen gloves to handle your weekly food scraps and garden gloves for when you transfer the fermented compost to the storage box. Additionally, a garden trowel is useful here to help stir the food into the soil.
How to make bokashi compost
Bokashi composting is really a two-part process. The first part is all about the fermentation that happens inside the bokashi bin in your kitchen. And, the second part is about what you do with the compost after it’s done fermenting. If you have a garden, this is when you’d dig a hole and bury the fermented compost directly into your planting beds. In a flat or apartment, however, we have to use an alternative route.
PART 1- Bin Fermentation (2+ weeks)

- Throughout the week, collect your food scraps in a bowl or small compost bin. Try and get the scraps into small pieces, which will make them easier to break down. When you have enough, it’s time to add them to your bokashi bin. You may have to do this more than once a week depending on how much scraps you have or how warm your flat is.
- Get your bokashi bin and add the scraps in layers because every bit of compost needs some bran on it to effectively ferment. Put a small amount of the scraps down, then sprinkle the bokashi bran on top and mix them together. How much you use will depend on the amount of food, but you can start with 2 heaping tablespoons. Continue this way until all your scraps are in the bin.
- Now you have to press/mash down on the food waste to get all the air out, then make sure the lid is on nice and tight. This is an important step as bokashi is an anaerobic fermentation, which means any air that gets into it will not allow the food to properly ferment and can lead to the development of “bad” mould. As the food ferments, it will soften, releasing liquid which, when pressed will create more room in the bin.
- Every few days you’ll want to open the tap on your bin and drain off the liquid, which is called bokashi tea. You can dilute the tea in water at a 1:100 ratio and use it to water your plants. You can also use it to clean your pipes by pouring the tea down the drain and letting it sit before flushing it with water.
- Repeat steps 1-4 until your bokashi bin is full.
- Now it’s time to let it sit for a few weeks to fully ferment. This time will vary depending on the temperature of where you’re keeping your bin. Bokashi composting doesn’t require a specific temperature range to work, but it’s recommended to keep the bin in a warm and dark location. Ideally, 18–25 °C is best for optimal fermentation.
I keep mine in a storage closet, and in the summer sometimes it only takes two weeks, but in the winter it can take more than a month. This is why it’s good to have multiple bins on hand. After a few weeks of fermenting, you are now ready to start part 2 of the bokashi process.
Don’t be surprised if the compost inside the container still looks like food. This first part has been about the initial breakdown of the compost and mixing it will soil in part two is what allows it to fully decompose.
PART 2- Soil Breakdown (2+ weeks)
- Find a plastic storage box that can be sealed, and drill holes into the bottom. If you don’t have a drill, you can use a hammer and a large nail to create the holes too (just be careful!). If you are keeping your box inside, skip this stage or get a second box for the first one to sit inside in order to catch any liquid that escapes.
- Fill the box with potting soil halfway and then dig a trench roughly 30cm deep in the centre to create a space for your fermented compost. You will need to add more soil if you’re using the storage box frequently or if you take out the compost for planting.
- Before you pour the compost into the box, make sure you’ve fully drained the bokashi bin to avoid excess liquid.
- Pour the fermented compost into the trench and fully mix it in with the soil.
- Wait a few weeks for the food to further break down, then use the soil to pot up a plant.
- Clean out your bokashi bin, then start again!
Watch how to use a bokashi bin
Extra Information + Tips
What not to put in your bokashi bin
While bokashi composting is a very effective and versatile method of composting, there are some things that should not be put into a bokashi bin. Inorganic materials like plastics, metals, and glass can’t be broken down, and they can damage the bokashi bin. The bokashi also can’t handle large amounts of yard waste. Small amounts of fats and oils are okay, but they should really be avoided as they can cause problems in the bin and attract pests. And, for non-plant-based readers, meat and dairy products can be put in the bokashi, but not in large amounts, as it causes the bin to become anaerobic and produce unpleasant odours.
Mould
If you open your bokashi bin and see white mould, don’t panic. It’s not necessarily bad and is actually a normal part of the bokashi composting process. The white mould that can sometimes form in a bokashi bin is a type of fungus called Aspergillus oryzae, which is a common component of bokashi bran.
The presence of white mould means that the beneficial microorganisms in the bokashi bran are working to break down the organic matter in the bin. The mould helps break down the organic matter and produces beneficial enzymes that can improve the soil when compost is added.
However, if the mould appears to be mostly black, green, or blue or if the compost has a foul odour, it may indicate that the compost has gone anaerobic (without oxygen) and needs to be aerated or discarded. A little amount should be okay, but too much is a bad thing. It’s important to keep the bin sealed and the organic matter compacted to minimise the growth of mould and promote the growth of beneficial bacteria in the bokashi compost.
Other Problems
Here are a few other things to watch out for:
Foul odour
One of the most common problems with bokashi composting is a foul smell. This can happen if the bokashi lid is not sealed properly or if there is not enough drainage to allow excess liquid to escape. To prevent this, make sure your bin is sealed tightly and has adequate drainage.
Slow decomposition
If your bokashi compost is taking a long time to break down, it could be because the temperature is too low. Bokashi composting works best at temperatures between 20 and 30°C (68 and 86°F), so make sure your composting area is warm enough.
Bugs
If you’re keeping your storage box outside during the second part of the bokashi process, pests like flies or maggots can be attracted to the compost if it’s not properly covered or sealed. To prevent this, make sure your storage box is sealed tightly.
pH imbalance
Bokashi composting can create a highly acidic environment, which can be harmful to some plants. I’ve read you can balance the pH by adding a small amount of agricultural lime or dolomite to the compost, but I’ve not had any issues with this, so I have not tested this myself.
Overall, bokashi composting has significantly decreased the amount of compost I put in my bins, and I love that the food will go into making more food for me and my husband. If you have any questions about bokashi or want to share your own experiences with small-space composting, let me know or share your photos on Instagram!
Product Links
Here are some links to supplies that are very similar to what I use. I may receive a small commission when you click the links and make a purchase, so thank you!

Bokashi Bin
These aren’t the same as the first set I purchased with my UK council discount, but they are very similar. Plus it comes with bokashi bran to get you started

Bokashi Bran
This is the bran I am currently using

Storage Box
This is very similar to the bin I use. I recommend getting a bin with wheels, as it is very heavy once filled with soil.
Download your free guide

